
How to Resize Pixel Art Without Blur: A 4× Worked Example
Fix blurry sprites with nearest-neighbor scaling. Compare real 4× PNG exports, avoid uneven pixel blocks, and check whether blur comes from the file or its display.
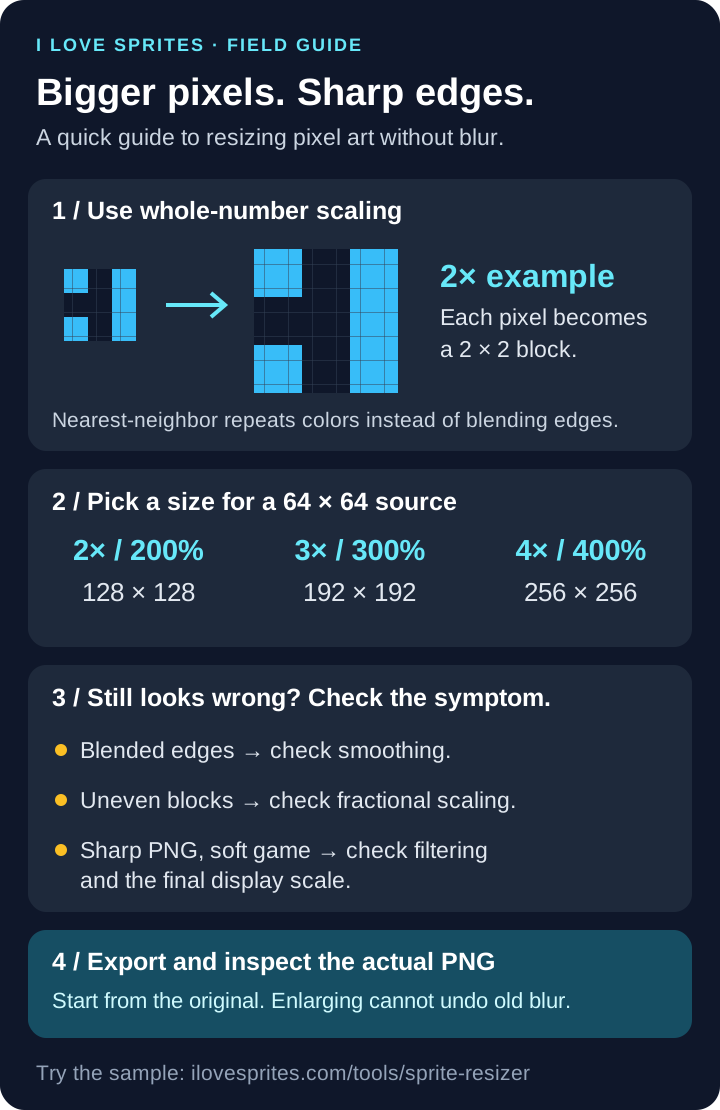
To enlarge pixel art without blurring its edges, start with the original image, choose nearest-neighbor resampling, and use a whole-number scale such as 2×, 3×, or 4×. A 64 × 64 sprite becomes 256 × 256 at 4×, with each original pixel repeated as a 4 × 4 block.
That fixes blur introduced during resizing. It does not repair an already blurred source, and a sharp PNG can still look soft when a browser or game scales it again. This guide helps you tell those problems apart using a small example you can download and reproduce.
First, identify what looks wrong
- Edges have new blended colors: smoothing may have been applied during export or display. Compare the downloaded file with the original at a whole-number zoom.
- Edges are sharp, but pixel blocks have uneven widths: check the scale factor. A non-integer enlargement cannot give every source pixel the same whole-number width.
- The PNG looks sharp in an image editor but soft in your game: investigate the engine's texture filtering and display scale before resizing the source again.
Keep a copy of the original. Repeatedly resizing a softened export makes it harder to work out where the problem began.
Compare two real 4× exports
Our source is a numbered 64 × 64 tile with flat colors and hard edges. Both outputs below are 256 × 256. The left uses nearest-neighbor; the right uses the browser's high-quality smoothing setting.




These reference exports were checked in Microsoft Edge: the nearest-neighbor output matched the source pixel-for-pixel after accounting for the 4× repetition, while the smooth output had different edge pixels. Exact smoothing can vary between browsers. The original sample artwork is free to use and modify, including commercially, without attribution.
Reproduce the sharp version in the sprite resizer
- Open the sprite resizer and click Try an example, or upload the original tile linked above.
- Choose 4× pixel art. This sets the scale to 400% and selects nearest-neighbor resampling.
- Check that the output dimensions are 256 × 256. The Before and after panel shows an enlarged detail of the first image, not every image in a batch.
- Download the PNG. Inspect the corners of the numeral and its border at 100% or another whole-number zoom.
- For comparison, switch Resampling to Smooth, keep 400%, and download again. Save the two exports separately if your browser asks about duplicate filenames.
Under the hood, the resizer controls the Canvas imageSmoothingEnabled setting. Disabling smoothing retains hard edges when enlarging pixel art; enabling it blends the scaled result. See the Canvas image smoothing documentation for the browser behavior.
Why 150% can look uneven even without blur
At 200%, every source pixel has room for two output pixels along each axis. At 300%, it has three. At 150%, a source pixel would need to occupy one and a half pixels, but the exported image must use a whole-pixel grid. Some source columns therefore occupy more output columns than others.
For the 64 × 64 sample, 2× produces 128 × 128, 3× produces 192 × 192, and 4× produces 256 × 256. Choose one of those when preserving equally sized pixel blocks matters. If you need an exact size that is not a whole-number multiple, expect to inspect and possibly redraw small details.
Also distinguish enlargement from fitting: Fit to max dimensions only shrinks an image to fit the chosen bounds while preserving its aspect ratio. Use percentage scaling to enlarge a sprite.
What if the source is already blurry?
Nearest-neighbor repeats the pixels it receives, including any blended colors already in the source. It cannot recover the original palette or reconstruct a missing hard edge. Return to the original art export if you have it. For a small sprite, manual cleanup in the pixel art editor may be more useful than another enlargement.
Likewise, shrinking can remove detail: reducing a 64 × 64 tile to 32 × 32 leaves one quarter as many pixels. A one-pixel feature may disappear. Always inspect small text, outlines, and isolated highlights after a reduction.
Check the result in your game
If the exported PNG is sharp but the game view is soft, compare your setup with our Unity, Godot, and Phaser starter projects. They use the same numbered artwork and nearest or point filtering, so you have a small working reference for separating asset problems from display settings.
Once one frame looks right, apply the same settings to the rest of the animation. Our bulk resizing guide covers organizing multiple resolution sets. Then use Images to Atlas to pack the resized frames, or keep the originals and scale them in the engine when separate larger files are unnecessary.
Common questions about resizing pixel art
Does nearest-neighbor improve the resolution of a sprite?
It increases the image dimensions by reusing existing colors. It does not draw new detail. That is useful when you want larger, equally sized pixel blocks rather than a reinterpretation of the artwork.
Can I make pixel art exactly 100 × 100 without distortion?
It depends on the source. A 50 × 50 sprite reaches 100 × 100 at an even 2× scale. A 64 × 64 sprite needs 156.25% scaling: its overall shape stays square, but its source pixels cannot all become equally sized output blocks. Use 128 × 128 for an even 2× enlargement, or adjust the artwork manually to meet a strict 100-pixel requirement.
Which setting should I use for painted sprites?
Try Smooth and compare the actual output. Nearest-neighbor is useful for deliberately hard pixel edges; painted gradients often benefit from smoothing. Use the sample comparison to understand the difference, then inspect your own artwork before resizing the whole batch.